Pillow 簡介#
Pillow 是 Python 圖像處理的基礎庫,它是一個免費開源的第三方庫,由一群 Python 社區志願者使用 Python 語言開發而成(主要貢獻者:Alex Clark)。
Pillow 的前身是 PIL 庫。不過 PIL 僅支持 Python2 版本,後由 Python 社區志願者移植到 Python3 版本,改名為 Pillow。Pillow 與 PIL 不能共存於同一環境中。
基礎知識#
這部分需要一定的 Python 基礎知識,以及對於顏色模式如 RGB 等的了解。
Pillow 安裝與導入#
安裝命令:pip install pillow
導入命令:from PIL import Image
Image 類#
Image 類是 Pillow 中最重要的類,使用 Image 類可以實例化 Image 對象。
Image 對象的創建#
在創建 Image 對象時,既可以創建新的圖片,也可以選擇打開已有文件。
使用 new () 方法可以創建新的對象,語法格式如下:
img = Image.new(mode, size, color)
參數說明如下:
- mode:圖像模式,字符串參數,比如 RGB(真彩圖像)、RGBA(真彩透明圖像)、L(灰度圖像)、CMYK(色彩圖打印模式)等;
- size:圖像大小,元組參數 (width, height) ,代表圖像的像素大小;
- color:圖片顏色,默認值為 0 表示黑色,參數值支持 (R,G,B) 三元組數字格式、顏色的十六進制值(如 '#66CCFF')以及顏色英文單詞。注意:當選擇不同顏色模式時,參數的形式也有差別。
使用 open () 方法可以從已有文件創建新的對象,語法格式如下:
img = Image.open(fp, mode='r', format=None)
參數說明如下:
- fp:文件路徑,字符串參數;
- mode:可選參數,默認設置為 'r',否則會出現異常。
- format:文件格式,默認為 None,表示按圖片默認格式打開。
Image 對象的屬性#
Image 對象常用屬性如下:
- size:存儲圖像大小的二元組。
- width:寬。
- height:高。
- format:文件格式。用 new () 方法生成的 Image 對象的 format 為 None。
- mode:圖像的色彩模式。
- readonly:表示圖像是否為只讀,返回 0 或 1。
- info:查看圖像相關信息,字典類型。
Image 對象的操作函數#
save()#
save () 方法用於保存圖像,當不指定文件格式時,它會以默認的圖片格式來存儲;如果指定圖片格式,則會以指定的格式存儲圖片。save () 的語法格式如下:
img.save(fp, format=None)
參數說明如下:
- fp:文件路徑;
- format:文件格式。
convert()#
有些情況下 save () 方法無法直接保存,例如 RGBA 顏色格式的圖片無法保存為 JPG。而 convert () 方法可以轉換圖片的顏色格式。其語法格式如下:
img1 = img.convert('RGB')
resize () 與 thumbnail ()#
實際使用中經常遇到需要調整圖像大小的情況,這時就要用 resize () 方法,該方法返回一個新的對象。其語法如下:
img1 = img.resize(size, resample=image.BICUBIC, box=None, reducing_gap=None)
參數說明:
- size:元組參數 (width, height),圖片縮放後的尺寸;
- resample:可選參數,指圖像重採樣濾波器,與 thumbnail () 的 resample 參數類似,默認為 Image.BICUBIC;
- box:對指定圖片區域進行縮放,box 的參數值是長度為 4 的像素坐標元組,即 (左,上,右,下)。注意,被指定的區域必須在原圖的範圍內,如果超出範圍就會報錯。當不傳該參數時,默認對整個原圖進行縮放;
- reducing_gap:可選參數,浮點參數值,用於優化圖片的縮放效果,常用參數值有 3.0 和 5.0。
當需要創建縮略圖時,往往使用 thumbnail () 方法,該方法直接修改原對象。其語法如下:
img.thumbnail(size, resample)
參數與 resize () 方法含義相同。
split () 與 merge ()#
split () 與 merge () 方法分別起到分離與合併顏色通道的作用。用法如下:
r, g, b = img.split()               # r,g,b 是各顏色通道的黑白圖像
img1 = Image.merge('RGB', [b,g,r])  # 合併
注意各顏色通道圖片需要大小相同,否則不能合併。
crop (),copy () 與 paste ()#
crop () 的作用是以矩形區域的方式對原圖像進行裁剪。其用法如下:
img_crop = img.crop(box);
box:表示裁剪區域,默認為 None,表示拷貝原圖像。
注意:box 是一個四元組,各參數分別表示被裁剪矩形區域的左上角 x、y 坐標和右下角 x,y 坐標。默認 (0, 0) 表示坐標原點,寬度的方向為 x 軸,高度的方向為 y 軸,每個像素點代表一個單位。
copy () 與 paste () 的作用是複製粘貼。copy () 方法較簡單,下面主要介紹 paste () 方法:
large_image.paste(image, box=None, mask=None)
該函數的作用是將一張圖片粘貼至另一張圖片中。注意,粘貼後的圖片模式將自動保持一致,不需要進行額外的轉換。參數說明如下:
- image:指被粘貼的圖片;
- box:指定圖片被粘貼的位置或者區域,其參數值是長度為 2 或者 4 的元組序列,長度為 2 時,表示具體的某一點 (x, y);長度為 4 則表示圖片粘貼的區域,此時區域的大小必須要和被粘貼的圖像大小保持一致。
- mask:可選參數,為圖片添加蒙版效果。
GIF 圖像#
GIF 圖像的特殊性在於它是一種動態圖像,其中往往包含較多的幀。因此它相比於 JPG,PNG 等格式有一些特殊方法。
save () 的參數#
GIF 圖像在使用 save () 保存時有更多的可用參數。部分參數如下:
- save_all:保存全部幀,一般設為 True
- append_images:在第一幀後接著的幀
- duration:兩幀的時間間隔,單位 ms
- transparency:透明度,設置為 0 為透明
- loop:循環次數,為 0 時永久循環
- disposal:是否處理,即播放下一幀時是否清除上一幀;設置為 2 為處理
用例:
# 這裡的 frame_list 存儲了所有的幀信息
frame_list[0].save('example.gif', format='gif', save_all=True, append_images=frame_list[1:], duration=50, transparency=0, loop=0, disposal=2)
tell () 與 seek ()#
訪問 GIF 圖像時在特定時刻只能訪問一幀。使用 tell () 方法可以查看當前的幀數;使用 seek () 方法可以跳轉到對應的幀。不過如果訪問到不存在的幀,會產生 EOFError。常見用法如下:
try:
    while True:
        # 一些處理操作
        img.seek(img.tell() + 1)  # 下一幀
except EOFError:
    pass
該用法可以遍歷 GIF 圖像的每一幀。
使用示例#
我們以表情包 “滑稽”
為例來展示 Pillow 庫的一些使用方式。
注:示例程序不一定是最優解。
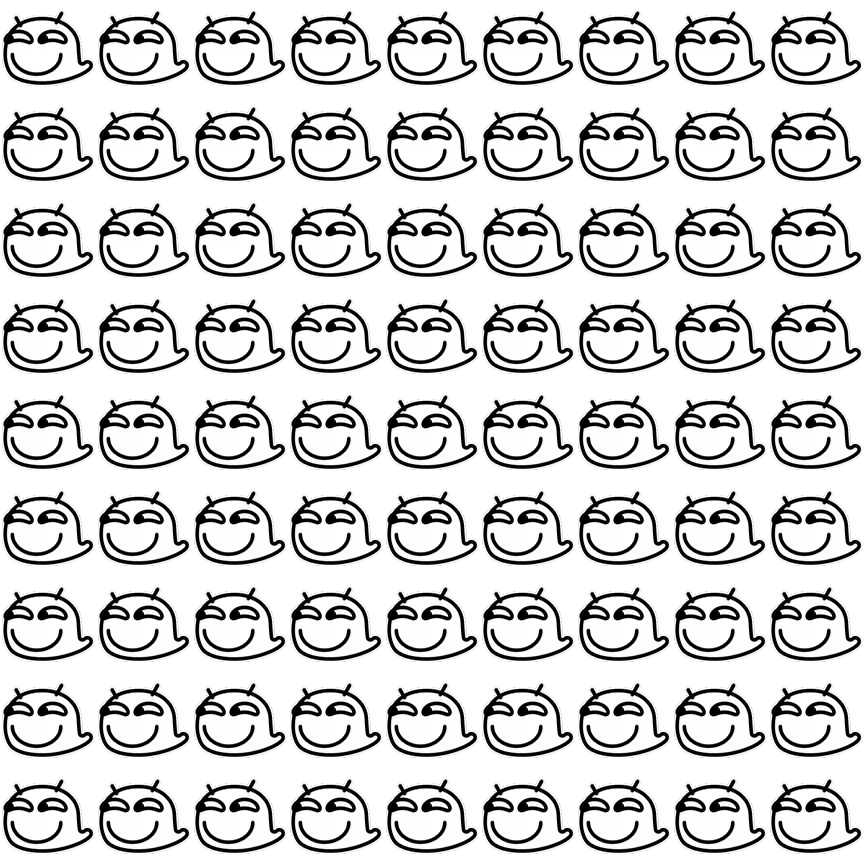
表情包拼接#
表情包拼接的大致思路是創建適合大小的背景,再將表情包粘貼到合適位置。代碼如下:
# 本文件與 huaji.gif 在同一目錄

from PIL import Image

img = Image.open('huaji.gif')
frame_list = []                         # 存儲最終 GIF 文件的幀
multiple = 9                            # 放大倍數

# 遍歷 gif 所有幀,當遍歷到最後一幀之後就會拋出 EOFError, 使程序結束
try:
    while True:
        frame = img.convert('RGBA')             # 轉換為 RGBA 顏色格式
        frame_large = Image.new('RGBA', (frame.width * multiple, frame.height * multiple),
                                '#00000000')    # 創建邊長為原先 multiple 倍的背景圖
        for i in range(multiple):
            for j in range(multiple):
                frame_large.paste(frame, (frame.width * i, frame.height * j))   # 在[i, j] 位置粘貼背景圖

        frame_list.append(frame_large)          # 將當前幀加入幀列表
        img.seek(img.tell() + 1)                # 遍歷下一幀
except EOFError:                                # 已讀到最後一幀之後
    pass


# save_all:         保存全部幀
# append_images:    接下來的圖片
# duration:         兩幀的時間間隔,單位 ms
# transparency:     透明
# loop:             循環次數,為 0 時永久循環
# disposal:         處理,即播放下一幀時清除上一幀

frame_list[0].save('huaji_enlarged.gif', format='gif', save_all=True,
                    append_images=frame_list[1:], duration=50, transparency=0, loop=0, disposal=2)
效果展示如下圖:
表情包顏色修改#
本程序中,表情包顏色修改的方式為對每個像素的顏色進行修改。代碼如下:
# 本文件與 huaji.gif 在同一目錄

from PIL import Image


# 將原顏色乘以目標顏色並返回
# RGBA 顏色以四元組 (r,g,b,a) 表示,r,g,b,a 均要混合
def to_color(color, target) -> tuple:
    'Change to target color.'

    temp = []
    for i in range(len(color)):
        temp.append(color[i] * target[i] // 255)    # 混合顏色方式為乘以目標顏色後除以其最大值
    return tuple(temp)


# 打開圖片
img = Image.open('huaji.gif')
frame_list = []
green = (0, 255, 0, 255)

# 遍歷所有幀並染色
try:
    while True:
        frame = img.convert('RGBA')
        pixels = frame.load()               # 原圖片的各像素,將其修改後原圖像也會修改
        for i in range(frame.width):
            for j in range(frame.height):   # 修改單個像素顏色
                pixels[i, j] = to_color(pixels[i, j], green)
        frame_list.append(frame)
        img.seek(img.tell() + 1)            # 下一幀
except EOFError:                            # 已全部遍歷
    pass

# 保存圖片
frame_list[0].save('huaji_green.gif', format='gif', save_all=True,
                   append_images=frame_list[1:], duration=50, transparency=0, loop=0, disposal=2)
效果展示:

表情包像素畫#
將 “表情包拼接” 與 “表情包顏色修改” 結合起來,就可以得到 “表情包像素畫” 功能。表情包像素畫的效果就是將圖片的每個像素都按照位置替換為相應顏色的一個表情包。
出於圖片文件大小及展示效果的考量,基底圖片的大小定為 40x40,替換用的表情包大小定為 20x20。代碼如下:
# 本文件與 huaji.gif 在同一目錄

from PIL import Image


# 將原顏色乘以目標顏色並返回
# RGBA 顏色以四元組 (r,g,b,a) 表示,r,g,b,a 均要混合
def to_color(color, target) -> tuple:
    'Change to target color.'

    temp = []
    for i in range(len(color)):
        temp.append(color[i] * target[i] // 255)    # 混合顏色方式為乘以目標顏色後除以其最大值
    return tuple(temp)


# 轉換單個形狀的顏色
def shape_to_color(original_image, color):
    image = original_image.convert('RGBA')          # 這裡需要 convert 來複製新對象,
                                                    # 否則修改的對象是 original_image
    shape_pixels = image.load()
    for i in range(image.width):
        for j in range(image.height):
            shape_pixels[i, j] = to_color(shape_pixels[i, j], color)
    return image


base_size = (40, 40)
shape_size = (20, 20)

img_base = Image.open('huaji.gif')      # 基底圖片
img_shape = Image.open('huaji.gif')     # 用於替換的形狀圖片

shape_list = []                         # 存儲替換形狀的各幀
frame_list = []                         # 存儲最終輸出表情的各幀

# 獲取替換形狀各幀
try:
    while True:
        shape = img_shape.convert('RGBA').resize(shape_size)
        shape_list.append(shape)
        img_shape.seek(img_shape.tell() + 1)
except EOFError:
    pass

# 生成像素畫各幀
try:
    while True:
        frame = img_base.convert('RGBA').resize(base_size)
        shape = shape_list[len(frame_list) % len(shape_list)]   # 按循環順序獲取 shape 的一幀
        frame_large = Image.new('RGBA', (frame.width * shape.width, frame.height * shape.height),
                                '#00000000')
        pixels = frame.load()
        for i in range(frame.width):
            for j in range(frame.height):
                new_shape = shape_to_color(shape, pixels[i, j]) # 轉換單個形狀顏色
                frame_large.paste(new_shape, (i * new_shape.width, j * new_shape.width))
        frame_list.append(frame_large)                          # 將當前幀加入幀列表
        img_base.seek(img_base.tell() + 1)                      # 遍歷下一幀
except EOFError:
    pass

# 保存圖片
frame_list[0].save('huaji_pixels.gif', format='gif', save_all=True,
                   append_images=frame_list[1:], duration=50, transparency=0, loop=0, disposal=2)
效果展示如下圖:

參考資料#
教程#
Pillow(PIL)入門教程(非常詳細)
Python 圖像處理 Pillow 庫 基礎篇
文檔#
stable 版本:Pillow stable 版本
latest 版本:Pillow latest 版本